The Polarities (Polarities Mod)


| Type | |
|---|---|
| Damage | 80 / 120 (eyeblast, lightning bolt) 120 / 160 (contact, all other attacks) |
| Max Life | 120,000 / 180,000 each (240,000 / 360,000 total) |
| Defense | 60 |
| Immune to |
| Coins | 18 |
|---|
- Item (Quantity)Rate
 Polarized Bar(Polarities Mod) (15-29/20-35)100%
 Soul of Smite(Polarities Mod) (20-39/25-40)100%
 E.M.P.(Polarities Mod)43.8%/50.0%
 Arc Bolter(Polarities Mod)43.8%/50.0%
 Diamagnetic Discharge(Polarities Mod)43.8%/50.0%
 Magnetic Streams(Polarities Mod)43.8%/50.0%
 Dipole Staff(Polarities Mod)43.8%/50.0%
 Electric Wings(Polarities Mod)6.67%
 Super Healing Potion (5-15)100%
- 10.0%
- 14.3%
- 14.3%
“Those spinny magnet things do not obey the laws of physics at all.
— Mechanic
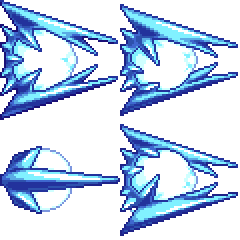
The Polarities are a challenging pair of bosses intended to be fought at the same point in progression as the Moon Lord, and the current final boss(es) and namesake of the Polarities Mod.
While they are alive, their exclusive music Field of Battle will play; if the Polarities Mod Music sidemod is not enabled, the vanilla track Boss 3 will play instead.
Spawning
The Polarities do not spawn on their own, and require the player to summon them by using a Supercharged Battery.
Behavior
The Polarities will always remain on opposite sides of the player, spawning in with Electris on the player's left and Magneton on their right. While the player is close to the polarities, one of them will be nearly stationary while the other moves, and while the player is far from them, they will both tend to follow the player's motion. Their motion is based off of a pair of antipodal points on a rolling sphere centered on the player, projected into 2D space.
The Polarities start by alternating between two fairly simple attacks attacks, which serve as an introduction to the fight:
- Auras: Both Polarities summon auras around themselves that prevent the player from getting too close: Electris's consists of a single large vortex, while Magneton's consists of a number of smaller orbiters. They then alternate shooting eyeblasts: Electris's eyeblasts are faster while Magneton's are homing. The first time this attack is performed, the auras are not summoned.
- Rings: Both Polarities summon contracting rings of projectiles that force the player closer: Electris's consists of a rapidly-moving chain of lightning, while Magneton's consists of orbiters similar to those used in its aura attack. They then alternate shooting eyeblasts.
Below 83.34%/87.5% health, they transition to their second phase, during which the following attacks are performed in order:
- Eyeblasts: Magneton shoots pairs of homing eyeblasts that arc to the left and right of the player, while Electris shoots pairs of faster eyeblasts directly at them.
- Rings 2: Both polarities summon slightly smaller versions of their ring attacks, and then alternate between shooting four telegraphed eyeblasts at right angles from each other, Electris shooting orthogonally and Magneton shooting diagonally.
- Lightning Bolts: Magneton summons three rings of aura projectiles around itself, while Electris shoots three bursts of omnidirectional telegraphed lightning bolts.
- Vortex: Electris and Magneton shoot small projectiles directly towards the player, which do no damage, instead colliding with each other to form an electromagnetic vortex, which moves towards the player while shooting a stream of homing magnetic blasts and periodic rings of electric blasts.
- Lightning Bolts 2: Electris shoots two bursts of omnidirectional telegraphed lightning bolts, while Magneton shoots large bursts of homing eyeblasts at the player at varying speeds.
- Magnetic Deathray: Electris summons an aura while Magneton shoots a telegraph that attempts to rotate towards the player, which expands into a massive deathray and stops rotating after a short time. Electris then summons a lightning ring and shoots a rapid stream of eyeblasts at the player.
- Electric Deathray: Magneton summons both an aura attack and a ring attack, while Electris summons a deathray that rotates towards the player.
- Electromagnetic Deathrays: Rotating circular arcs form between Electris and Magneton, which quickly expand into damaging circular deathrays.
In Expert Mode, below 40% health, they transition into their third phase, during which the following attacks are performed in order:
- Anticipating Deathrays: The Polarities alternate between shooting two telegraphed lingering deathrays each, which anticipate the player's motion. When one polarity's deathray activates, the other will shoot a telegraphed set of orthogonal eyeblasts.
- Giant Vortex: Electris and Magneton shoot small projectiles directly towards the player, which do no damage, instead colliding with each other to form a larger electromagnetic vortex, which remains stationary while shooting rings of electric and magnetic blasts.
- Electromagnetic Deathrays 2: Rotating circular arcs form between Electris and Magneton, which quickly expand into damaging circular deathrays. At the same time, circular waves move from one Polarity to the other, alternating between a safe inactive state and a dangerous active state.
When one reaches 1 health, It becomes invulnerable (and doesn't die) until the other is brought down to the same amount health. at this point both will explode into an energy ball that spirals towards the location the player was when defeated, forming the loot.
Aftermath
Once the Polarities have been defeated for the first time, the following will occur:
- The Ghostwriter will begin selling The Magnet Thief.
Tips
- Phase transition is based on their combined health, rather than individual health. This makes them both transition at the same time. Unlike The Twins, it is not beneficial to focus on one Polarity over the other, especially as they simply become invulnerable and continue attacking when their health is drained until both are defeated.
- The motion of the Polarities can be counterintuitive and requires some getting used to, but being able to directly affect their positioning means you can align the attacks to an extent. Knowing when to move towards attacks in order to force them away from you is important.
- Pages setting LuaCache keys
- Polarities Mod
- Polarities Mod/Boss NPCs
- Polarities Mod/Hardmode-only NPCs

